Form Integrations
EmailOctopus
Step 1: Set Up EmailOctopus Integration
To connect your form with EmailOctopus, follow the steps below:
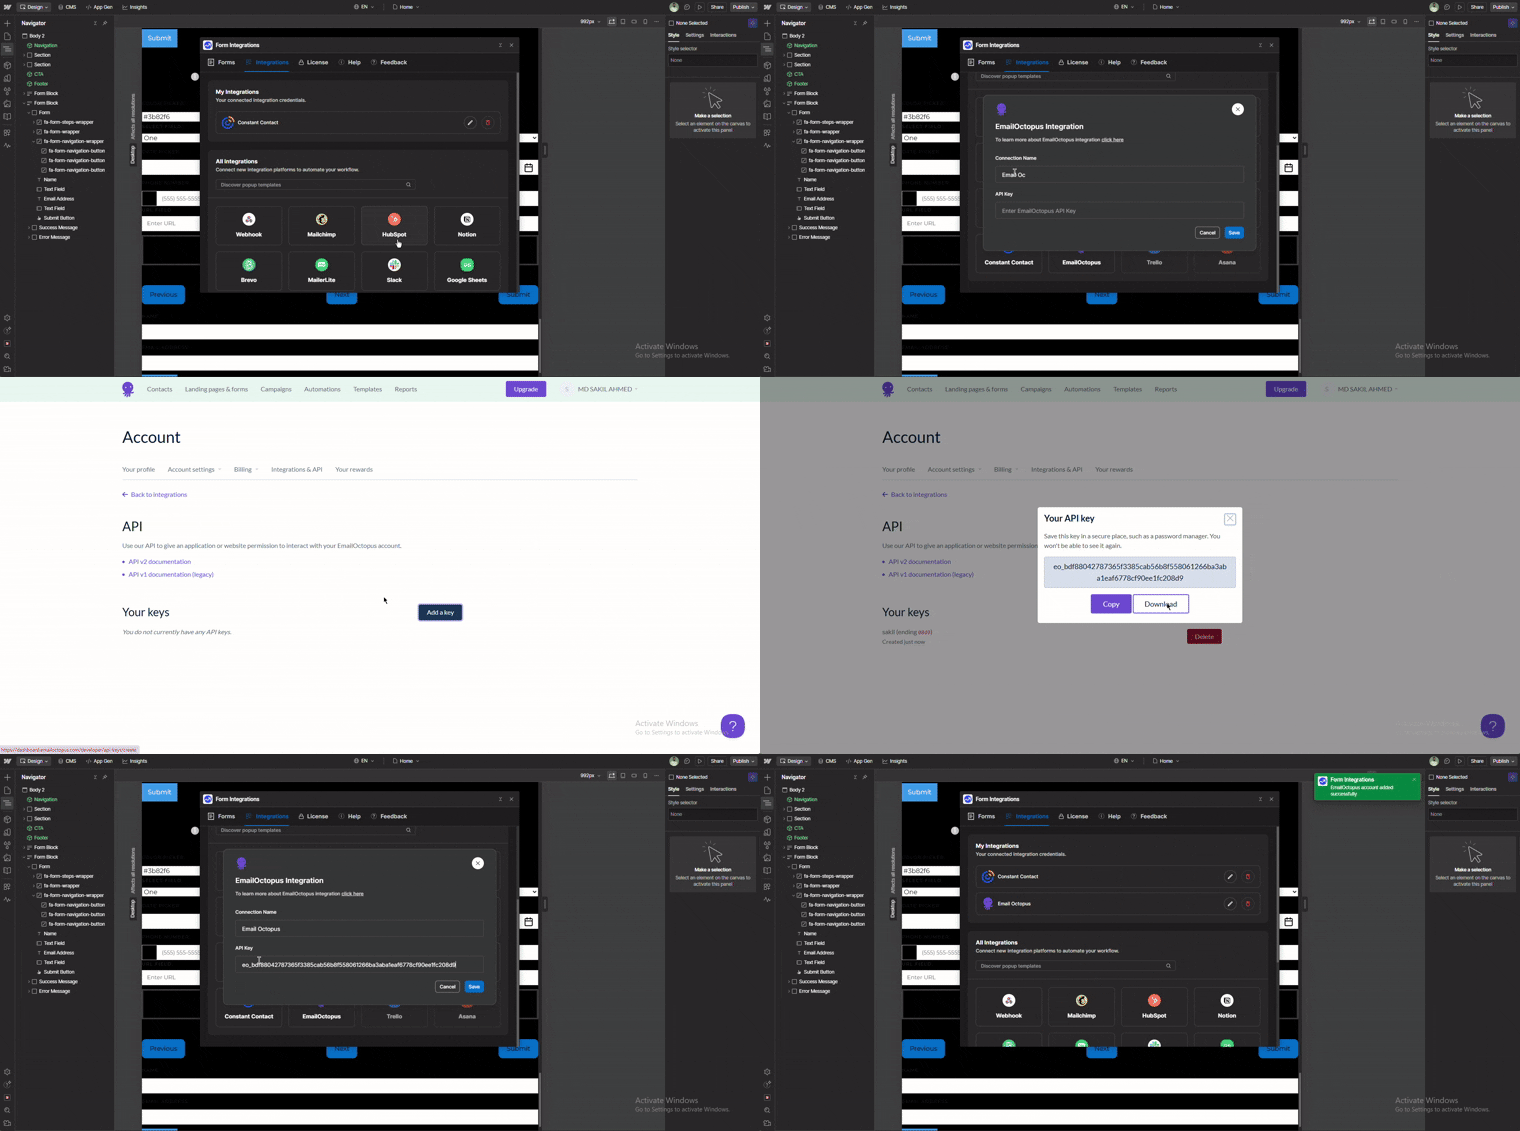
- Navigate to the Integrations Tab
From the main dashboard, go to the Integrations tab. - Connect EmailOctopus
Click the EmailOctopus Button.
An EmailOctopus integration setup form will appear. - Configure the EmailOctopus Connection
- Enter a unique name to identify this EmailOctopus integration.
- Click the Connect New Email Octopus button.
- Authenticate with EmailOctopus
A new window will open, prompting you to authenticate your EmailOctopus account:- If you're not signed in, log in to your EmailOctopus account.
- Grant the necessary permissions to authorize the integration.
🔐 After successful authentication, your EmailOctopus API will be connected and ready to use within the app.
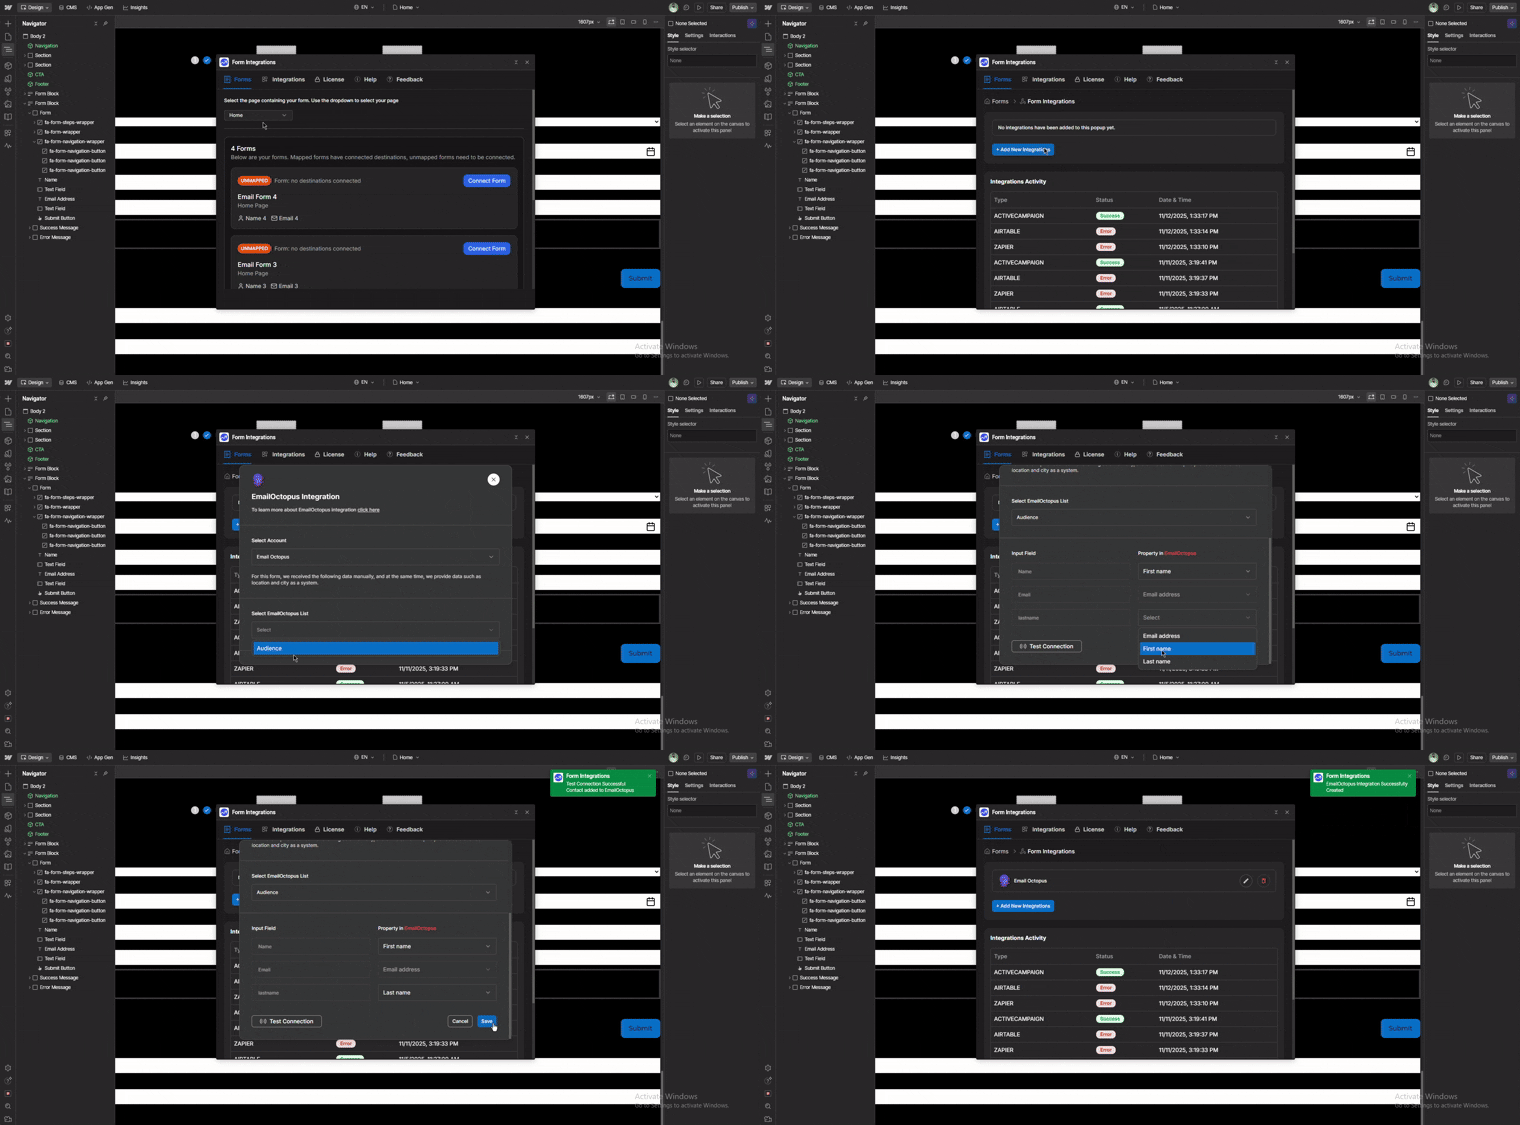
Step 2: Connect EmailOctopus to a form
To integrate EmailOctopus with a specific Form, follow the steps below:
- Navigate to the Forms Tab
From the dashboard, go to the Forms tab. - Connect the Target Form
Select the target form page from the dropdown, then click the form’s Connect Form button. - Click “Add New Integration”
This will open a modal displaying all available integration options. - Connect EmailOctopus
Click the Connect button next to EmailOctopus.
The EmailOctopus integration setup form will appear. - Configure the EmailOctopus Integration
- Select the EmailOctopus API connection you created earlier.
- Choose the EmailOctopus list(audience) where form submissions should be sent.
- Map the Form input fields to the corresponding EmailOctopus fields to ensure data is saved correctly.
- Test the Connection
Click Test Connection to verify that the integration is working properly. - Save the Integration
If the test is successful, click Save to finalize the integration.
✅ Your Form is now successfully integrated with Constant Contact and will send form data directly to your selected list.