AI SEO Boost
AI Blog Writer
AI Blog Writer lets you research topics, generate full blog posts, and publish them directly into your Webflow CMS collection — all from inside the Designer. The workflow is split into five steps.
Step 1: Setup
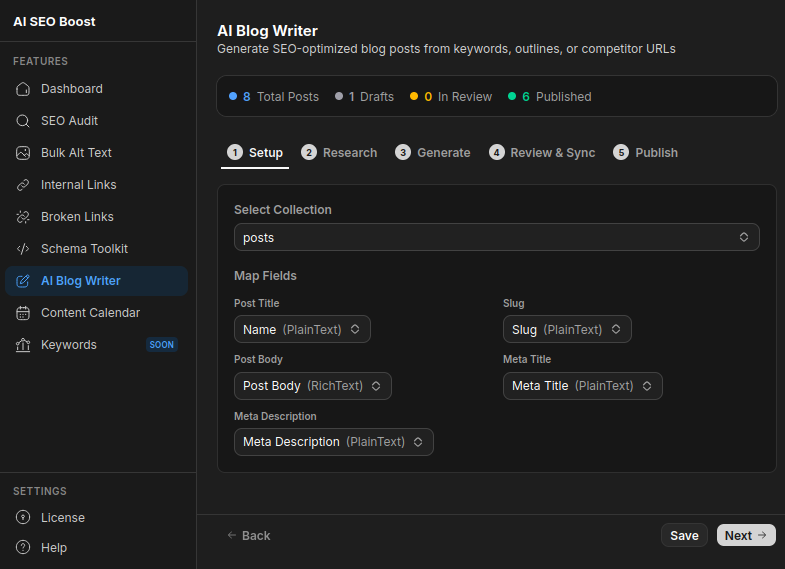
Before generating any content, connect the app to your CMS collection and map your fields.
- Open AI Blog Writer and go to the Setup tab.
- Select an existing Webflow CMS collection from the dropdown, or create a new one.
- Map your collection fields — at minimum, map the Post Body field. Without this, generated content will not be saved.
- Optionally map Title, Slug, Meta Description, and Featured Image fields.
- Toggle global settings:
- Auto SEO Optimize — automatically optimises title and meta description during generation
- Include Internal Links — AI will suggest internal links within the generated content
- Click Save to confirm your setup.
Step 2: Research
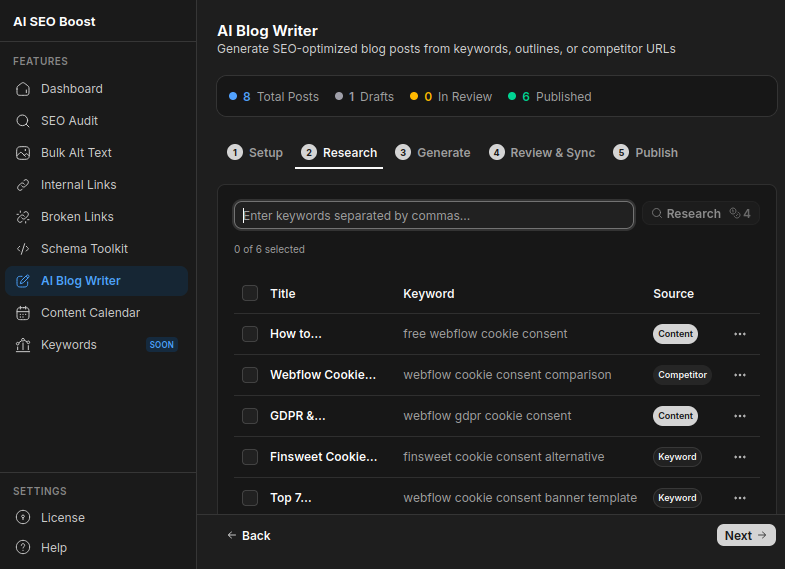
Add keyword & Hit Research
- Enter one or more keywords separated by commas in the search box.
- Click Research. This costs 4 credits per keyword.
Preview & Add to queue
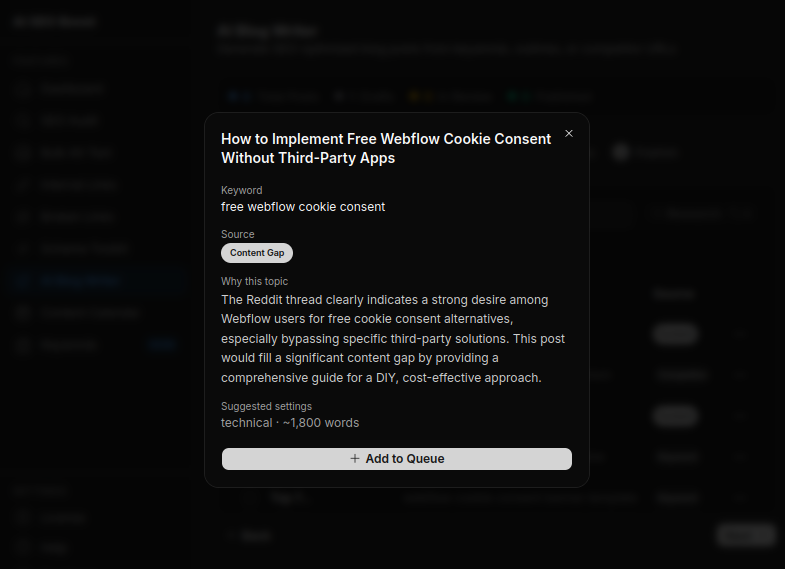
- The app runs a search and AI analysis to return a list of suggested blog post titles and angles.
- Review the suggestions. Click Add to Queue on any topic you want to generate, or select multiple and add them in bulk.
- Dismiss suggestions you don't need using the delete button.
You can skip Research and go straight to Generate if you already have topics in mind.
Step 3: Generate
Queue Status
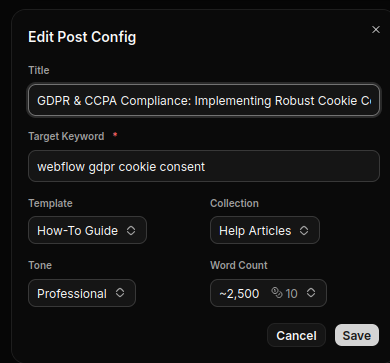
- Each post in the queue shows its title, tone, word count, and template. Edit any of these before generating. If posts are in generation queue they also show up here showing what posts are currently being generated.
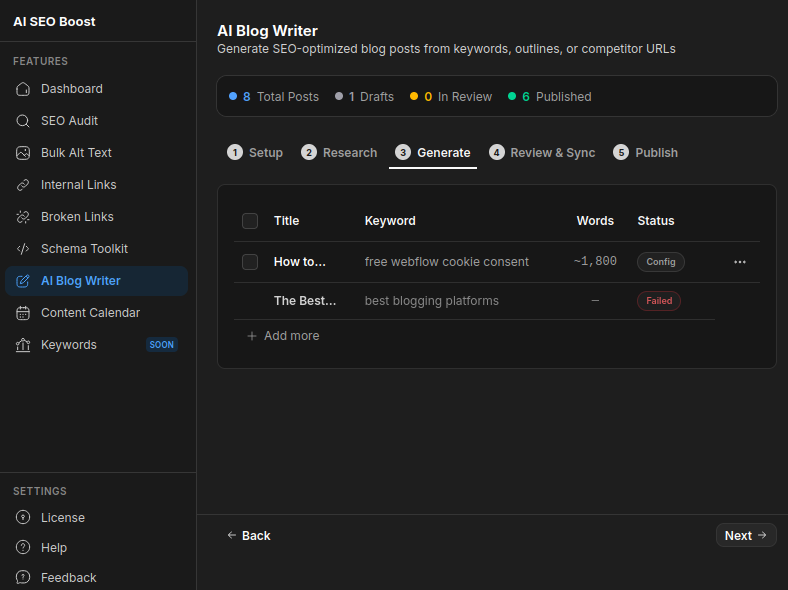
Templates control the post structure. Available templates:
- How-To Guide — step-by-step instructional content
- Listicle — numbered tips or tools
- Comparison Post — side-by-side product or tool analysis
- Case Study — real-world results and methodology
- Product Review — detailed feature and pricing evaluation
- Opinion/Thought Leadership — expert perspective pieces
- Tone options: Professional, Casual, Technical, Conversational, Authoritative.
- Word count tiers and credit costs:
- Up to 500 words — 2 credits
- Up to 1,000 words — 4 credits
- Up to 1,500 words — 6 credits
- Up to 2,000 words — 8 credits
- Up to 2,500 words — 10 credits
- Up to 3,000 words — 12 credits
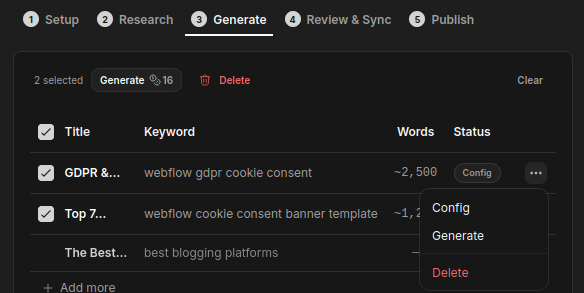
Generate
- Click Generate on individual posts or use Generate All to queue everything at once.
- Generation runs in the background. You can move to the next step while posts are being generated.
Step 4: Review and Sync
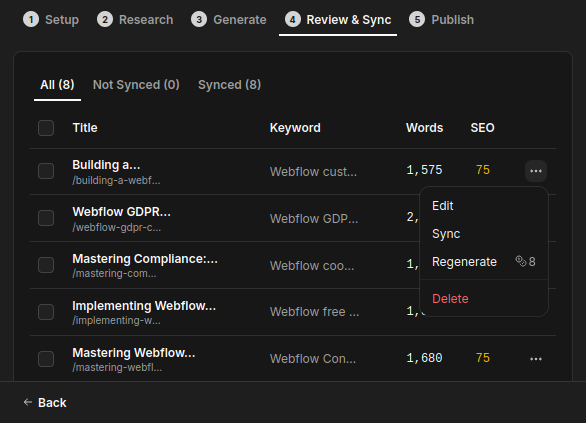
Review generated posts and push them to your Webflow CMS collection.
- All generated posts appear in the table with their title, status, and word count.
- Click a post to read the full content, make edits, or regenerate it. Regenerating costs the same credits as the original generation.
- Once satisfied, click Add to Collection to sync the post to your Webflow CMS as a draft item.
- Posts that fail generation are marked with an error — you can retry them individually.
Step 5: Publish
Manage your CMS collection items and publish them to your live site.
- The Publish tab shows all items currently in your connected Webflow CMS collection.
- Review titles, slugs, and statuses.
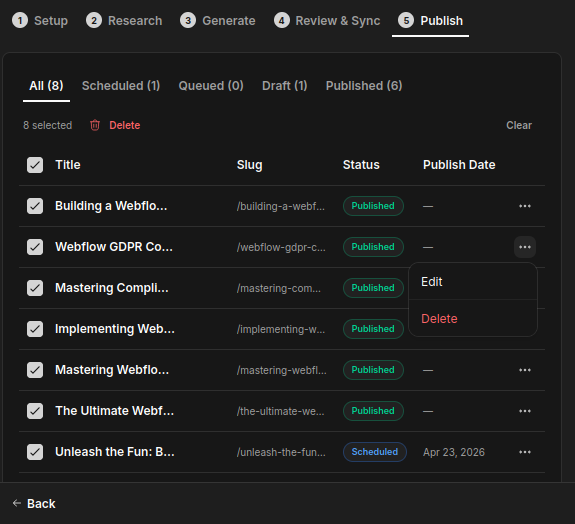
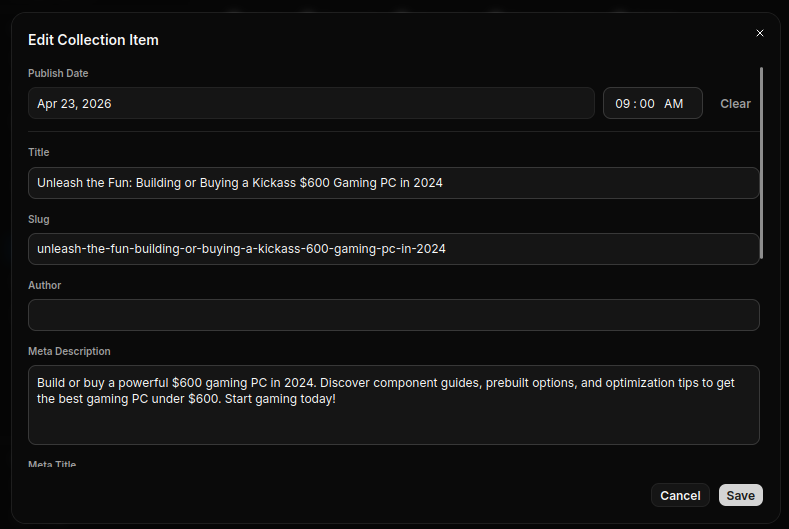
Edit item details if needed before publishing.
- Use Webflow's native publish flow to make items live. The app syncs the published status back automatically via webhooks.